Sunday, September 30, 2007

Unison Bridge... part 1


There are two bars that go across the soundboard that the strings are stretched over (one bar is called the bridge, the other is the nut).

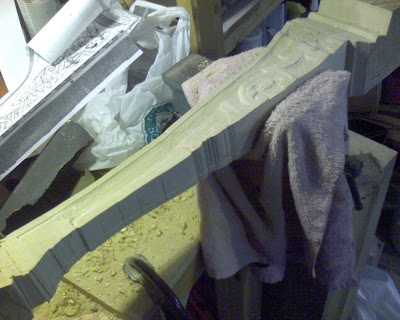
In the pictures here you can see the beginning of the bridge. So far it's sawn out to rough size and shape... now I need to shape it to the exact dimensions with a spoke shave.

The plans for the instrument provide measurements for four cross sections of the bridge, down to the 1/100th of an inch. This is a critical part of the instrument because errors in the dimensions could cause the strings to buzz, and it also affects the scale quality.

(In the picture, everything is upside down, but you can get an idea for where things go.)

Thursday, September 20, 2007

American Woodworker

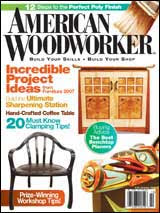
There's a good article about my project in this month's American Woodworker, in conjunction with a great story on the hobby shop!


Go grab a copy! :)

And thanks to the folks at American Woodworker!

Milling the Rose; Milling the Bridges

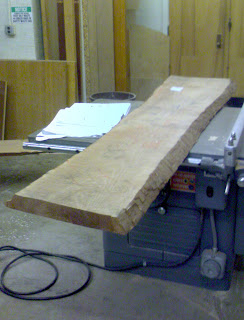
Almost all the remaining wood I need arrived from Hearne Hardwoods this week. I got some massive boards... e.g. a 24" wide piece of European beech that weighs over 100 lbs (in image). I also got a really nice piece of Gaboon ebony for the key veneer.

The beech for the bridges came 2" thick; the bridges are only 0.5" thick on average. I started milling down the planks to rough size today, cutting a chunk out of the big beech plank and flattening a face on the joiner.

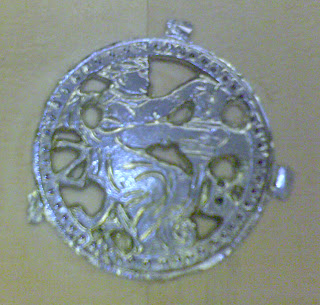
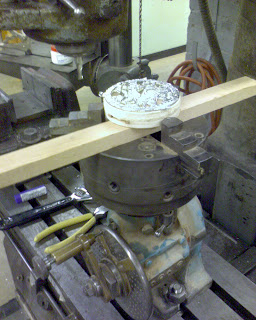
Today I also milled down the rose from before. I reduced the thickness of it to less than 1/8" by sweeping the back of it with the mill. I also used an indexing head to clean up the punched pattern around the rim, and cut off the excess material.

Thursday, September 06, 2007

Soundboard, part III


Planing to thickness
The resawn boards were about 1/4 to 5/16 inch thick. They need to be 9/100ths of an inch thick. I was afraid to use the thickness planer to go less than 3/16ths of an inch thick; beyond that, it is all hand planing.

The piece show in the picture at right is to the correct thickness for now (1/10th of an inch). I have four more boards to plane, and then a small amount to remove with a sander.

Soundboard, part II


Joining
For the past four days, I've been gluing the boards together with hot ground hide glue. This glue, as the name implies, melts around 150 degrees F and gels within five minutes. It cures very hard and resonates with the wood. It is the same kind of glue that was used in the original instrument.

The Soundboard, alla New Yankee Workshop

Resawing
The boards from Switzerland came about twice the thickness I needed. My first step was resawing the wood (cutting it down its length) into half-thickness pieces. This was done on the bandsaw with a fresh blade and a point fence. (The piece of wood in the picture was a scrap that I tested the fence setup with.)

Wednesday, August 29, 2007

Wood!

Just got the soundboard wood from Switzerland today. (Quite a fun time getting it here: shipping was about $400, plus duty; and had to clear the wood through customs at the airport.) But it's here, and it sounds super nice when you tap on it. It's the same wood that Stradivarius used to make his violins. It's harvested by a small company in the mountains after the full moon, around midnight, then flown down the mountain by helicopter and quartersawn and air dried.

Friday, August 03, 2007

Making the Rose: Wax Carving


Here's a pic of the new rose wax positive...

Friday, July 27, 2007

Leg Carving 1B


I decided I'm most likely going to replace the first leg I carved for a few reasons: 1. I didn't rough it out finely enough, so the edges are too wavy; 2. I made it too deep, so the bases of the raised elements stand out and are ugly; 3. overall I'm more used to the tools and think I can do a better job.

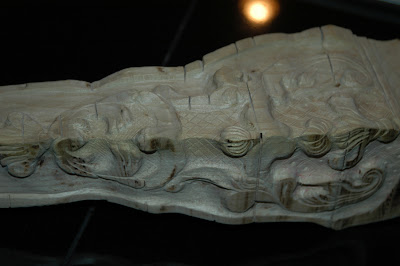
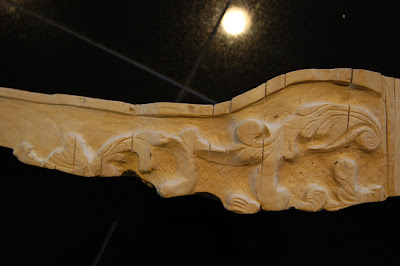
In just three hours today, I got as far as these pictures show. Notice the band along the edge is a totally consistent width. The carving isn't nearly as deep (though I really can't decide if I like the carving deep or shallow). Most of the speed came from roughing out the shapes with a high-speed cutting bit on my Dremel tool. If I can get to the point where I finish a leg every five days, I'll be quite happy.

I still can't quite get the organic look to the carving that the original had :(. It's getting better though.

Please take a look at the first leg a few posts down. I'd like to know other people's opinions!

Thursday, July 26, 2007

Straight from the Mold

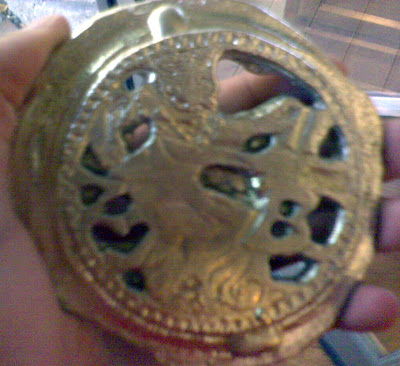
Here's the rose out of the mold. I now need to cut off the excess, thin the back (it's about 1 cm thick and only needs to be 5 mm) and file some edges so they're smoother.

(sorry... I'm too lazy at the moment to get my real camera out)

Edit 27-July: I decided I'm going to remake the rose, since it was fast. This time I'll tint the wax so I can actually see what I'm carving.

Casting the Rose


In the soundboard there is a 3" hole with a metal "rose" (medallion-like thing) in it. To make this, I poured a disk of wax, carved a positive rose, cast plaster around it, baked the mold, melted the wax out of the plaster, then melted a mix of lead and tin and poured it into the mold. (Actually... I'm not 100% positive what the metal is. I used plumber's bar solder, and it had the "this product contains chemicals known to the state of California to cause cancer..." warning on it, so it really could be any mix of lead, tin, silver, antimony and copper. I was hoping to find 50-50 lead-tin.)

I haven't broken the mold off yet, as the metal is still hardening. But here are pics of the casting!

Saturday, July 21, 2007

Carving


Here's 90 percent of one leg. This took probably 100 hours. I still need to lightly etch the back sides, fill in the grooves from the roughing out (I roughed out with a band saw and intended to rough out more finely with a spoke shave, but never did, so the groves remained), finish smoothing out tool marks, and finally gild with 24 karat gold.

As always, click for larger images!

Tools used: V tool, four gouges of various sizes, angled flat blade, Dremel polishing wheels.

(I swear the leg looks better in person... these pics aren't great!)

Friday, March 30, 2007

Update for March

Parallel grain section of bottom complete (under the keyboard, the grain is perpendicular). All sides of cabinet complete. All belly rails and lower frame work complete. Wrest plank supports complete. (Done with dovetailing!)

Next comes the wrestplank, keyboard and upper frame work. I'm redesigning the upper framework so that it isn't prone to failure like the original instrument.

This morning I went to the Museum of Fine Arts before they opened to the public to photograph the painting with flash photography.
Many thanks to Aaron Kakos and the museum!

Friday, February 16, 2007

Photos!

I just got my cable to connect my cell phone to my computer. Below are the pics of what I've done so far. Click on any image to see the full-sized version.

Photos VIII


The result so far! Something to be said for full-scale plans. Completed in this photo are the two dovetail joints in the back, and the three pairs of sliding dovetails for the lower frame members. (clamp on bentside is to temporarily straighten out some cupping caused by the steam)

Photos VII

Milling the sliding dovetails in the bentside and spine.

Photos VI

Dovetails in the tail and bentside.

Photos V

oops- nicely done reversed dove tails. I cut these off and redid them.

Photos IV

More shop: two drill presses, 12" bandsaw, not shown: radial arm saw and miter saw to the right. I fit the entire bending form into the bandsaw to cut out notches to clamp in!

Photos III


The shop: 12" joiner, 6" belt sander, 24" planer...

Photos II


2. Bending form. Pain to make every the same -- I cut roughly to size with a bandsaw, then used a router and sanders. With Hayami's help, I got the bend into the wood within 60 second or so. First time bending the wood split.

Photos I


1. Steam bending 1x12 poplar. The hose goes to a wallpaper steamer. I just used a few layers of plastic bags as the steam chamber.

Friday, February 09, 2007

Dovetailing

I've spent the last week or so making the three corner joints and cutting the sliding dovetails for the braces.

Each of the three corner joints has five pins, and each is at some funky angle, such as 131 degrees, 59 degrees, and in the worst case, about 90 degrees but in the curve of the bentside. I've finished the two that are straight (that join to the tail), and am saving the curve for last. I've been doing the cutting with a Japanese back saw and Marples chisles. Each set of pins and tails takes about five hours.

The sliding dovetails were much easier and more fun. I did them all on a milling machine with digital X, Y tracking. I cut the matching tails in fir beams that span the width of the case on a router table. The beams were somewhat of a pain to cut, as they too are at such angles as 53 and 56 degrees.

Once I finish cutting all of the beams (they get tails in both ends, and a curve cut out of the middle), I'll do the final fitting of the tail corner dovetails, and glue it all together. Then comes the stringing (thin poplar that the soundboard rests on), the smaller crosspieces, the wrestplank and the bottom, and then I'm near done with the skeleton.